Config_Frontend
Frontend Deployment
The restaurant app is deployed on AWS services using S3 Bucket, CloudFront, and Route 53. Below are the step-by-step instructions for deployment:
Create and Configure S3 Bucket
Create an S3 Bucket:
Go to the AWS Management Console.
Navigate to the S3 service.
Click on Create bucket.
Give your bucket a name (e.g., my-restaurant-app-static) and select a region.
Configure bucket settings as needed.

Upload Build Files
After the bucket is created, go inside the bucket in the AWS Management Console.
Upload the build files and folders of the project. To build the project, run the following command:
$ npm run build
Once the build process is complete, upload the contents of the build directory to the S3 bucket.
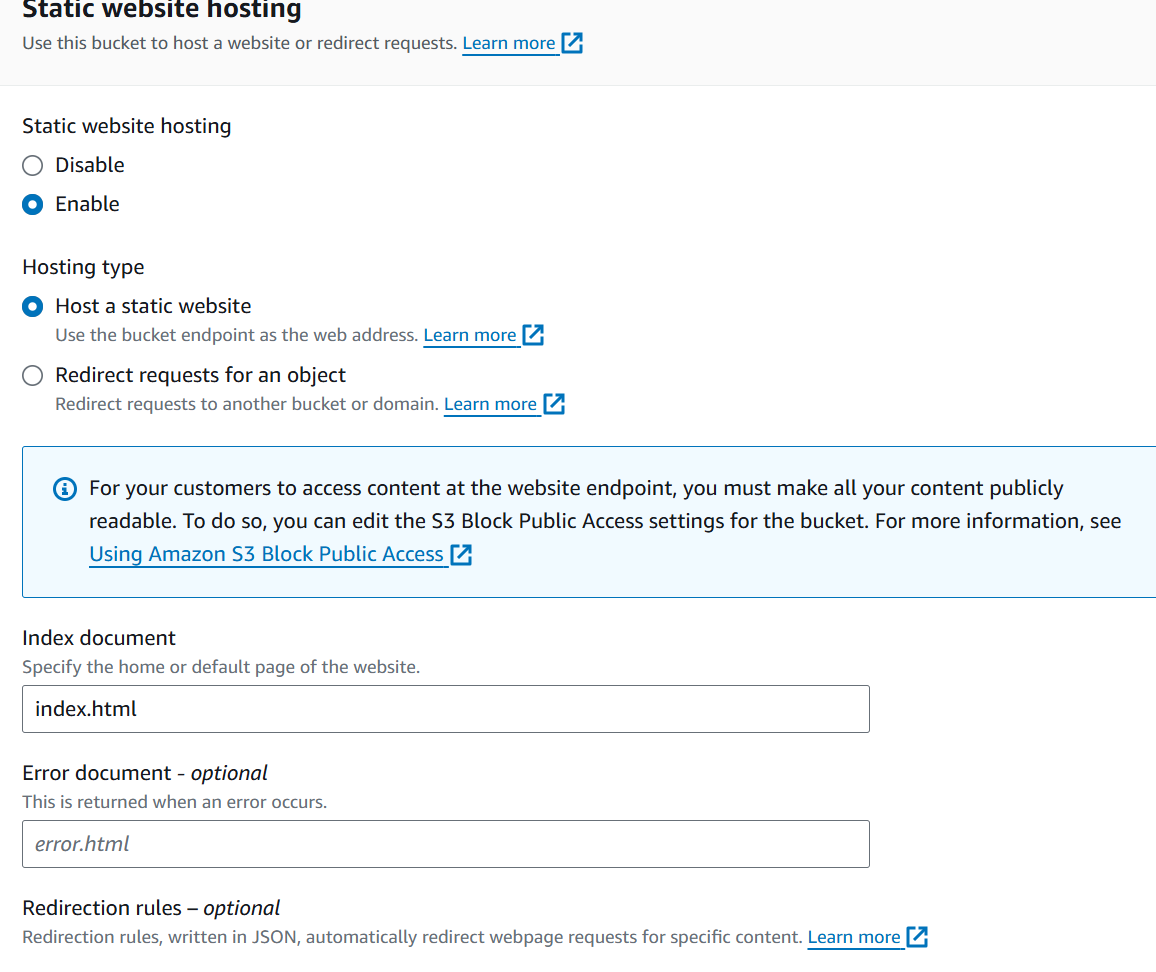
Configure Static Website Hosting
Go to the Properties section of the S3 bucket.
Click the Edit button in the Static website hosting section.
Enable the Static website hosting setting.
Configure the index document (e.g., index.html) and error document (e.g., error.html) as needed.
Save the changes.
Update the Bucket policy in Permissions
{
   "Version": "2012-10-17",
   "Statement": [
       {
           "Sid": "PublicReadGetObject",
           "Effect": "Allow",
           "Principal": "*",
           "Action": [
               "s3:GetObject"
           ],
           "Resource": [
               "arn:aws:s3:::Bucket-Name/*"
           ]
       }
   ]
}
Replace Bucket-Name with your actual bucket name.
Set Up CloudFront Distribution And Configure Route 53 for DNS Management
Configure DNS and SSL Certificates
Create a Hosted Zone in Route 53
Go to the Route 53 service in the AWS Management Console.
Click on Hosted zones.
Click on Create hosted zone.
Enter your domain name (e.g., example.com) and select the type of hosted zone (usually Public hosted zone).
Click Create to create the hosted zone.
Request a Public Certificate
Go to the Certificate Manager service in the AWS Management Console.
Click on Certificates in the left navigation pane.
Click on Request a certificate.
Select Request a public certificate and click Next.
Enter your domain name (e.g., example.com) and any additional domain names you want to include.
Click Next to proceed.
Choose the validation method (e.g., DNS validation or Email validation) and follow the instructions to complete the validation process.
Click Next, review the request, and click Confirm and request.
Wait for the certificate to be issued. You will receive a notification once it’s ready.
Create CloudFront Distribution:
Go to the AWS Management Console.
Navigate to the CloudFront service.
Click on Create Distribution.
Under the Web section, click on Get Started.

Configure Distribution Settings
Origin Settings:
Origin Domain Name: Select your S3 bucket from the dropdown list.
Origin Path: Leave empty.
Origin ID: This will be filled automatically.
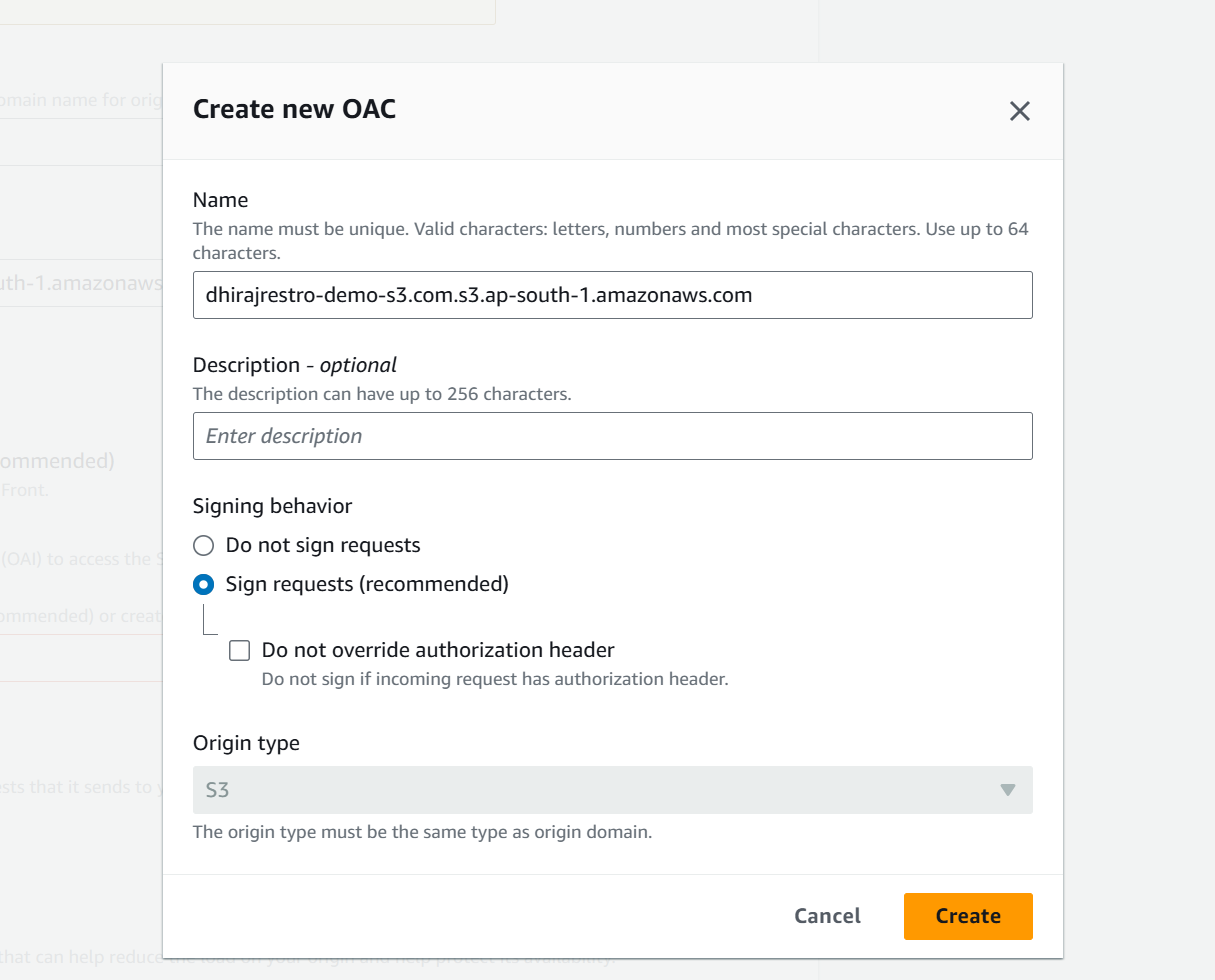
Restrict Bucket Access: Choose Yes if you want to restrict access to the bucket through CloudFront only.
Origin Access Control Policy: Create or select an existing policy if restricted access is chosen.

Default Cache Behavior Settings:
Viewer Protocol Policy: Set to Redirect HTTP to HTTPS or HTTPS Only.
Allowed HTTP Methods: Select GET, HEAD.
Distribution Settings:
Price Class: Choose based on your geographic needs.
Alternate Domain Names (CNAMEs): Add your custom domain if using one.
SSL Certificate: Select Default CloudFront Certificate or upload a custom certificate if using a custom domain.
Create the Distribution
Review the settings and click Create Distribution.
It may take some time for CloudFront to deploy the distribution.
- Update DNS (if using custom domain)
Go to your DNS provider and set up a CNAME record pointing to the CloudFront distribution domain name.
Either use Distribution domain name or Alternate domain names to access the website